

drip irrigation installation guide pdf
Learn how to install drip irrigation systems efficiently with our comprehensive guide. Download the PDF now and start saving water!
Drip irrigation is a water-saving method that delivers water directly to plant roots through emitters, reducing evaporation and runoff. It is highly efficient for crops and home gardens, promoting healthy plant growth while conserving resources. This guide provides a comprehensive overview of drip irrigation installation, from planning to maintenance, ensuring optimal water use and crop productivity.
What is Drip Irrigation?
Drip irrigation, also known as micro or trickle irrigation, is a water delivery system that applies water slowly and directly to plant roots through emitters. It minimizes evaporation and runoff, making it highly efficient for agricultural and home garden use. This method uses a network of tubes and emitters to distribute water precisely, ensuring optimal hydration for plants while conserving water. Drip systems are adaptable to various soil types and plant requirements, making them a sustainable choice for modern farming and gardening practices. By focusing water delivery at the root zone, drip irrigation enhances plant growth and reduces waste, making it a popular choice for water-conscious growers worldwide.
Benefits of Drip Irrigation
Drip irrigation offers numerous advantages, including significant water conservation, reduced runoff, and minimized evaporation. By delivering water directly to the root zone, it ensures efficient hydration, leading to higher crop yields and improved plant growth. This method also reduces energy costs compared to traditional irrigation systems. Additionally, drip irrigation promotes healthier plants by preventing overwatering and reducing the risk of soil-borne diseases. Its scalability and adaptability make it suitable for both small gardens and large agricultural fields. Furthermore, drip systems allow for precise fertilizer application, reducing chemical leaching into the environment. Overall, drip irrigation is a sustainable and cost-effective solution for modern agriculture and gardening needs.
Understanding Drip Irrigation Components
Understanding drip irrigation components is essential for effective system design. Key parts include tubing, emitters, filters, and fertilizers, ensuring precise water delivery and nutrient application to plants.
Overview of Drip Irrigation Parts
Drip irrigation systems consist of several key components designed to deliver water efficiently. The main parts include water source, pump, filter, tubing, and emitters. The water source could be a well, reservoir, or municipal supply. A pump is often required to pressurize the system. Filters are crucial to prevent clogging by removing debris. Tubing, typically made of durable materials like polyethylene, distributes water throughout the field. Emitters, placed at intervals, release water at a controlled rate. Additional components may include fittings, valves, and fertilizers for nutrient delivery. Each part plays a vital role in ensuring the system operates effectively and efficiently.
Types of Emitters and Their Uses
Emitters are a critical component of drip irrigation systems, designed to release water at precise rates. The most common types include drip emitters, which deliver water directly to the soil, and micro-sprinkler emitters, suitable for larger plants or areas. Inline emitters are built into the drip tubing, offering uniform water distribution across the field. Additionally, bubbler emitters are used for low-pressure systems, creating a gentle flow ideal for landscapes. Each emitter type varies in flow rate, spacing, and application, making them adaptable to different crops and soil conditions. Proper emitter selection ensures efficient water delivery, optimizing plant growth and resource conservation.
Role of Filters and Fertilizers in Drip Systems
Filters are essential in drip irrigation systems to prevent clogging caused by sediment, debris, or algae. They ensure clean water flows through emitters, maintaining system efficiency and longevity. Fertilizers, on the other hand, can be integrated into drip systems through a process called fertigation, allowing precise nutrient delivery directly to plant roots. This method enhances nutrient uptake, reduces waste, and promotes healthy plant growth. Proper use of filters and fertilizers ensures optimal water and nutrient distribution, making drip irrigation a highly efficient and sustainable irrigation method for various crops and landscapes.

Designing Your Drip Irrigation System
Designing a drip irrigation system involves assessing water requirements, selecting components, and planning layout to ensure efficient water delivery and optimal crop productivity.
Assessing Water Requirements for Your Crop
Assessing water requirements is crucial for designing an efficient drip irrigation system. Factors such as crop type, growth stage, soil moisture, and climate play a significant role. Soil moisture levels should be monitored to determine the optimal irrigation schedule. Evapotranspiration (ET) rates, which indicate water loss from soil and plants, are key for calculating water needs. For crops, understanding their specific water demands during different growth phases ensures precise irrigation. This step helps in selecting the right emitters and spacing to deliver water accurately. Accurate assessment prevents overwatering and underwatering, promoting healthy plant growth and resource conservation. Proper water management is essential for maximizing crop yields and system efficiency.
Selecting the Right Drip Irrigation Components
Selecting appropriate drip irrigation components ensures system efficiency and longevity. Start by choosing durable tubing and fittings suitable for your water pressure and flow rate. Emitters should match plant water requirements, with options like drippers, micro-sprinklers, or bubblers. Filters are essential to prevent clogging from debris, while fertilizers can be integrated for precise nutrient delivery. Pressure regulators maintain consistent water flow, and valves enable sectioned irrigation control. Consider automation controllers for timed watering. Each component must align with crop needs, soil type, and water source quality. Proper selection optimizes water use, reduces maintenance, and enhances crop productivity. Consulting guides or experts can help tailor choices for specific setups. This step is vital for a successful drip irrigation system.
Planning the Layout and Spacing of Drip Lines

Planning the layout and spacing of drip lines is crucial for uniform water distribution and optimal plant growth. Begin by mapping your field or garden, considering crop spacing and water requirements. Drip tubing should be laid along plant rows, with emitters spaced according to soil type, water flow rate, and plant needs. Ensure proper alignment to avoid overlapping or gaps. For row crops, spacing typically ranges from 12 to 24 inches, while for trees or shrubs, it may vary based on root zone size. Use grid layouts for even coverage in larger areas. Proper planning prevents overwatering and ensures resources are used efficiently, maximizing crop yields and system performance. Tools like irrigation design software or online planners can assist in creating an accurate layout. This step ensures your drip irrigation system operates effectively and sustainably. Always consider future expansion or adjustments when designing your layout. Proper spacing and alignment are key to long-term success.

Choosing the Right Location and Preparation
Selecting a suitable location for your drip irrigation system ensures efficiency. Position the water source near the field to minimize tubing length and reduce energy costs. Prepare the area by clearing debris and leveling the ground to ensure even water distribution and proper system operation. This step is essential for long-term functionality and resource optimization.
Identifying the Best Location for the Water Source
Choosing the right location for your water source is crucial for an efficient drip irrigation system. Opt for a spot that provides easy access to the main water supply while minimizing the distance to your crops. Ensure the water source is protected from contamination to maintain clean water quality. Consider elevations to leverage gravity for water flow, reducing the need for pumps. Proximity to the field also cuts down on tubing costs and potential leaks. Proper placement ensures consistent water pressure, essential for uniform irrigation. This step sets the foundation for a well-functioning system, optimizing both performance and resource use. Regular inspections of the water source area are recommended to prevent debris buildup and maintain system efficiency. Planning ahead ensures long-term reliability and effectiveness of your drip irrigation setup.
Preparing the Field for Drip Irrigation Installation
Preparing the field is essential for a successful drip irrigation system. Start by clearing the land of debris, rocks, and weeds to ensure smooth installation. Level the ground to maintain even water distribution and prevent pooling. If necessary, till the soil to loosen it, especially for subsurface drip systems. Mark the rows or planting areas where drip lines will be laid out. Remove any obstacles that could interfere with tubing or emitters. Consider installing mulch or cover crops to retain moisture and reduce evaporation. Proper field preparation ensures optimal water flow and prevents clogging, leading to a more efficient and durable irrigation system. This step is crucial for maximizing the benefits of drip irrigation in your agricultural or gardening setup.
Considering Filtration Systems for Clean Water Supply
Filtration systems are vital for ensuring clean water supply in drip irrigation, preventing clogs in emitters and tubing. Choose filters based on water quality—screen, disk, or sand filters are common options. Regular maintenance, like cleaning or replacing filters, is essential to maintain water flow and system efficiency. Additionally, consider integrating fertilizers into the filtration process to enhance plant nutrition. A well-designed filtration system not only protects the irrigation setup but also promotes healthy crop growth by delivering clean, nutrient-rich water directly to the roots. This step is critical for long-term system performance and agricultural productivity.

Step-by-Step Installation Guide
Plan the layout, prepare the site, and gather tools. Lay tubing, connect fittings, install emitters, and test for leaks. Ensure proper water flow and system functionality for optimal irrigation efficiency.
Preparing the Site and Tools for Installation
Before installing a drip irrigation system, survey the land to identify slopes, plants, and obstacles. Clear debris, rocks, and weeds to ensure smooth tubing layout. Gather essential tools like tubing cutters, punchers, and connectors. Measure and mark the area where drip lines will be placed, considering plant spacing and water requirements. Ensure the water source is accessible and functional. Lay out all components, such as filters and emitters, to streamline the installation process. Proper site preparation and tool organization are crucial for a efficient and effective drip irrigation setup.
Laying Out the Drip Tubing and Connecting Fittings
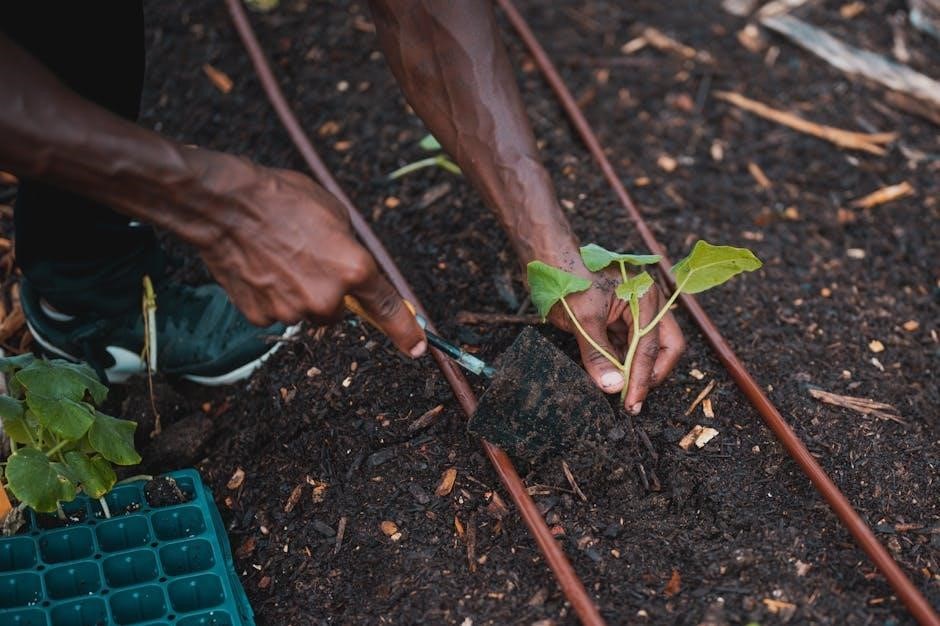
Begin by unrolling the drip tubing across the prepared site, following the marked layout. Secure the tubing to the ground using stakes to prevent movement. Connect fittings, such as couplers and elbows, to direct water flow around plants or obstacles. Use a punch tool to create holes for emitters, ensuring proper spacing for water distribution. Attach emitters to the tubing, aligning them with plant locations. Tighten all connections firmly to avoid leaks. Ensure the system slopes slightly to allow drainage and prevent waterlogging. Properly laying out the tubing and fittings ensures even water distribution and system longevity. Double-check all connections before testing the system.

Installing Emitters and Ensuring Proper Water Flow
Emitters are crucial for precise water delivery. Select emitters based on flow rate and plant needs. Install them at intervals that match plant spacing, typically 12-24 inches apart. Use a punch tool to create clean holes in the tubing. Insert emitters firmly to ensure a watertight seal. For areas requiring more water, consider higher flow emitters. After installation, flush the system to remove debris. Test water flow by running the system; check for uniform distribution and adjust emitters as needed. Proper emitter placement ensures efficient water use and healthy plant growth. Regular inspections can prevent clogging and maintain optimal water flow throughout the season.
Testing the System for Leaks and Proper Functionality
After installation, thoroughly test the drip irrigation system for leaks and functionality. Begin by pressurizing the system and inspecting all connections, tubing, and emitters for visible leaks or damage. Flush the system to remove debris that may clog emitters. Check water flow at each emitter to ensure uniform distribution. Common issues include clogged emitters, kinked tubing, or loose fittings. Address leaks promptly by replacing damaged components or tightening connections. Test the system under normal operating pressure and flow rate to simulate real-world conditions. Regular testing ensures the system operates efficiently, delivering water precisely where needed. Proper functionality is crucial for maximizing water savings and crop productivity.


Maintenance and Troubleshooting
Regularly inspect and clean filters to prevent clogs. Check tubing and emitters for damage or blockages. Address leaks promptly to maintain efficiency and prevent water waste.
Routine Maintenance Checks for Drip Systems
Routine maintenance is essential to ensure the efficiency and longevity of drip irrigation systems. Regularly inspect the tubing and emitters for signs of damage or blockages. Clean filters to prevent clogging, which can disrupt water flow. Check for leaks in the tubing and connections, as even small breaches can lead to water waste. Monitor water pressure to maintain optimal flow rates. Inspect fertigation systems if used, ensuring proper nutrient delivery. Flush the system periodically to remove sediment buildup. Winterize the system by draining water from tubing and components to prevent freezing damage. Regular checks help prevent issues before they escalate, ensuring consistent water delivery to crops.
Common Issues and How to Fix Them
Common issues in drip irrigation systems include clogged emitters, leaking tubing, and uneven water distribution. To address clogs, clean or replace emitters regularly. For leaks, inspect and replace damaged sections of tubing. Uneven water flow may require adjusting pressure regulators or repositioning emitters. Additionally, check for blockages in filters and ensure proper system flushing. Root intrusion can occur over time; use root-resistant tubing to mitigate this. Regular maintenance, such as cleaning filters and monitoring water pressure, helps prevent these issues. Addressing problems promptly ensures efficient water delivery and system longevity, maintaining healthy plant growth and resource conservation. Routine inspections are key to sustaining optimal performance.
Winterizing Your Drip Irrigation System
Winterizing your drip irrigation system is essential to protect it from freezing temperatures and damage. Start by draining all water from the tubing and components. Use compressed air to blow out remaining water from the pipes and fittings. Disconnect and store emitters, filters, and other small parts in a dry, protected area. Apply a small amount of antifreeze to the system if recommended by the manufacturer. Insulate exposed pipes and above-ground components in extremely cold climates. Finally, turn off the water supply and label the system for easy reactivation in spring. Proper winterization ensures the system remains functional and ready for the next growing season.
This guide provides a comprehensive approach to drip irrigation installation, highlighting its benefits and key steps. For further details, refer to UC Master Gardeners guides, Stokes County Cooperative Extension resources, and NMSU studies on drip irrigation efficiency.
Drip irrigation offers a water-efficient solution for crops and gardens, delivering water directly to roots, reducing evaporation and runoff. Key steps include assessing water needs, selecting components, and proper installation. Benefits include improved crop yields, reduced water consumption, and lower operational costs. It is ideal for various plants and soil types, promoting sustainable agriculture. Regular maintenance ensures long-term efficiency. This method is particularly advantageous in water-scarce regions, making it a viable choice for farmers and gardeners seeking to optimize resources. By following a structured approach, users can achieve significant benefits, ensuring healthy plant growth and environmental conservation. Consult guides from UC Master Gardeners or Stokes County Extension for detailed insights.
Where to Find Additional Resources and Guides
Additional resources and guides on drip irrigation can be found through agricultural extension services and gardening experts. The UC Master Gardeners and Stokes County Cooperative Extension offer detailed pamphlets and workshops. Online platforms provide PDF guides for installation and maintenance. These resources cover component selection, system design, and troubleshooting. They are ideal for both homeowners and farmers seeking to optimize water use. Consulting these guides ensures a well-planned and efficient drip irrigation system.